3D Scan to 3D Print: Replacing Broken Parts
Save Money on Maintenance & Repair Operations
Thursday 22nd May 2025
Following on from our previous success with 3D scanning for restoration (
read the restoration story) and 3D scanning to create bespoke bracketry (
read the bespoke bracketry story), the CREAT3D team have completed another 3D scan to 3D print project, this time focused on replacing broken components.
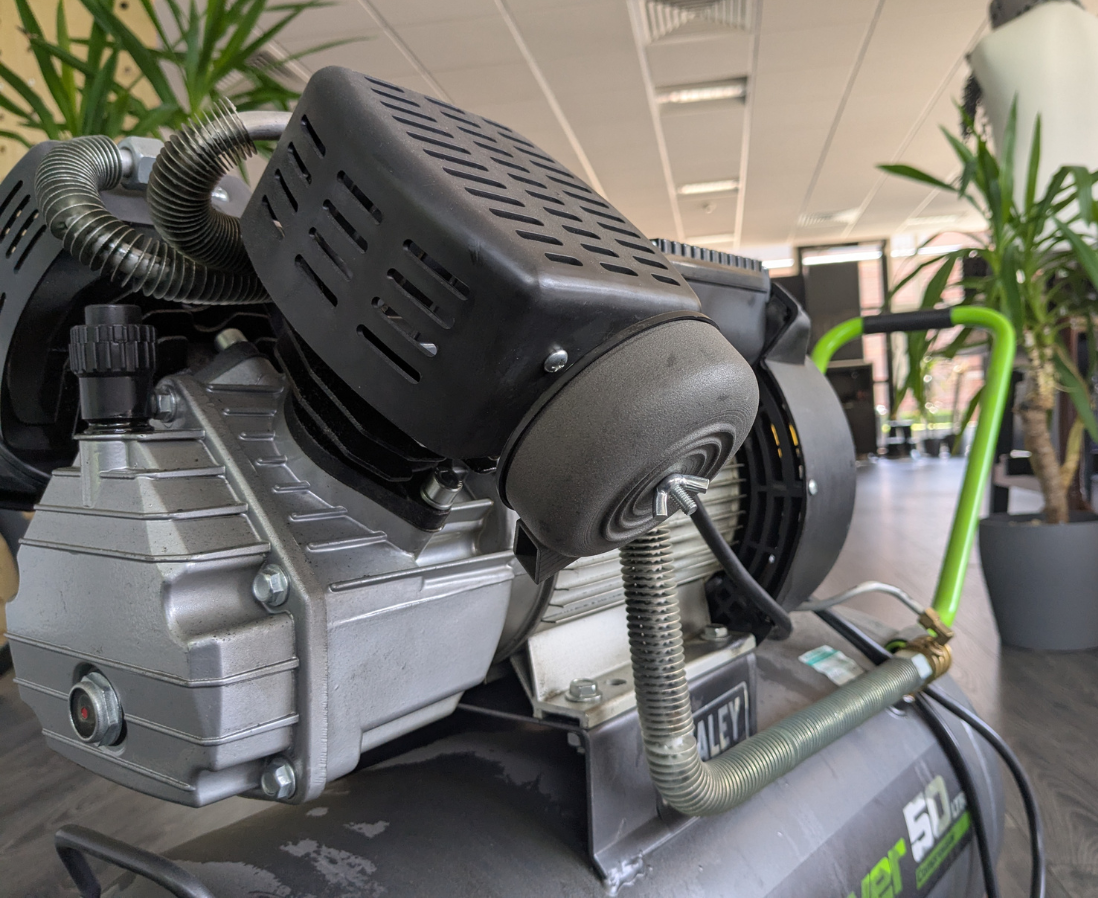
This project focuses on replacing a broken air intake cover on an air compressor. The cover is required to reduce contamination to the filter and extend machinery life. Part is not readily available. Using 3D scanning, we are able to capture the cover’s geometry, repair the break and redesign the model in CAD before 3D printing an exact-fit replacement.
In the world of maintenance and repair, fast solutions, precision and cost-efficiency are critical. Whether it’s reviving legacy equipment, repairing damaged parts, reconstructing components or bringing obsolete parts back to life, traditional repair workflows can often be time-consuming and expensive.
That’s where the combined power of 3D scanning and Additive Manufacturing steps in, offering a smarter, more streamlined approach to repair and maintenance.
3D scanning provides a practical, highly accurate solution for capturing the physical geometry of existing components, especially when original CAD data is unavailable or outdated or, the part geometry is too complex to measure and design in CAD.
3D scanning enables teams to digitally replicate parts, repair and improve, in a fraction of the time, instead of purely relying on manual measurements or reverse engineering from scratch. When paired with Additive Manufacturing, the scanned data can be turned directly into functional components, delivering faster results at a lower cost.
Our Project: Replacing Broken Components
Our team used the tools at our disposal!
We used the Peel 3 3D scanner and the Formlabs Fuse SLS 3D printing system.
We used a 3D scanner as a practical solution to generate the design ready for 3D printing.
- Fast, practical solution – replacement part scanned, printed and fitted in under 24 hours. The original cover was obsolete, difficult to get a replacement from original OEM. 3D scanning was a fast solution to an in-house repair
- Cost saving – replacement part cost just £4.08 to print
Our tools
Our step-by-step process
1. Assess and prepare the broken part
Our single-phase compressor has an air intake filter with a cover. The cover had been broken during routine replacement of a filter – the original fastening broke the centre of the cover when fitting.
To prevent excess build up of contaminants and to extend the filter and compressor machine life, we removed the broken part and 3D scanned it to get dimensions.
The original cover was black with some shine to the surface. To counter this, we sprayed a thin layer of primer to give the scanner more “texture” to pick up during the scanning process.
2. 3D scanning
We 3D scanned in a room with low natural lighting and placed positioning targets on both the broken part itself and the scanning surface. This allowed for enhanced tracking ability of the scanner whilst rotating the part during scanning.
Using the Peel 3 scanner, we captured multiple scans from different angles to gain maximum scan data. Once completed, the scans were merged into a single, complete mesh.
3. Refine & clean scan data
Imported the scan data into Peel CAD software. Repaired, smoothed and filled the broken element in the mesh using the in-built software tools to generate a clean model.
4. Use DfAM to adjust the CAD
Used mesh generated in Peel software to act as reference points when reviewing and adjusting the CAD model.
Adjusted design to accommodate being manufacturing Additively. Original cover was made of multiple parts. In CAD, made changes to the original geometry of air intake cover duct, to be a single part, removing joins and creating a consistent wall thickness
5. Prepare for 3D printing
Exported the finished cover STL file and imported into PreForm (Formlabs print preparation software) to prepare orientation and material selection for 3D printing. The cover was printed in Nylon 12 using SLS technology on the Formlabs Fuse 1+ 30W.
6. 3D printing
SLS (Selective Laser Sintering) technology was chosen to print the part due to the ability to print without the need for support structures and thus blemishes on the part.
Nylon 12 was chosen due to its mechanical properties – sufficient strength to withstand the compressor’s vibration and any heat generation during use.
Print time: 3 hours 43 mins
Part cost: £4.08
7. Post-processing
Cleaned the printed part using the Formlabs Fuse Sift for initial de-powdering, before finishing in the Formlabs Fuse Blast to remove any remaining powder and polish the part.
No further finishing was done to the new cover.
Original broken cover compared to new 3D printed cover
Replacment cover in situ covering air intake filter on compressor
8. Final installation
Installed the replacement cover using existing mounting point.
Air intake filter covered once again. Job done!
Save Time and Money using 3D Scanning with AM for Repair & Maintenance
By enabling accurate data of damaged or worn components to be easily obtained, without the need for original drawings or tooling, using 3D scanning in conjunction with Additive Manufacturing empowers teams to repair rather than replace.
It eliminates the frustration of long supplier lead times, minimum order quantities, and hard-to-source components, helping keep machinery running and downtime to a minimum.
Ultimately, it's a more sustainable, efficient, and cost-effective way to extend the life of assets, reduce waste, and take control of the repair process on your own terms.
For more information about 3D scanning and Additive Manufacturing, view our range of scanners or contact us for advice on your application.
Want to discuss the best option for adopting Additive technologies?