3D Scan to 3D Print: Manufacturing Bespoke Bracketry
For Maintenance & Operational Improvements
Thursday 8th May 2025
Following on from our previous success with 3D scanning for restoration (read the restoration story), we recently took on another scanning project, this time focused on creating bespoke bracketry for our compressor unit.
By using 3D scanning technology, we captured a detailed digital model of the compressor's interior to assess the available voids and spaces. This allowed us to design and 3D print custom-fit brackets to secure loose cabling, improve the internal layout, and enhance accessibility for maintenance or repair.
The power of combining 3D scanning with Additive Manufacturing (AM) means Engineers can go from problem to solution incredibly quickly - capturing the exact geometry of a challenging environment, designing bespoke components that fit precisely, and 3D printing them in-house.
The result is reduced downtime, fewer workarounds, and a more efficient, safer working environment.
These quick, cost-effective fixes can make a real difference when it comes to operational reliability and ease of servicing equipment.
Our Project: Creating Bespoke Fittings
Our team used the tools at our disposal!
We used the Peel 3 3D scanner as a practical solution to design and 3D print bespoke fittings and brackets. By scanning the internals of our compressor we were able to determine what space we have available to design into.
We used a 3D scanner as a practical solution:
- Practical – the spaces and voids were too difficult to measure, limited space meant that you can’t fit in measuring tools. The alternative would be to measure “by eye”. By 3D scanning, we were able to get exact dimensions to know our design constraints
- Time saving – scanning was far more time efficient. It took just a few minutes to capture the data and merge scans to see the internal dimensions of the compressor
Our tools
Our step-by-step process
1. Assess the object:
The compressor had a number of loose cables which were restricting access and entangling during maintenance and repair operations.
We wanted to scan the internal dimensions of the compressor to understand what spacing and voids we had to design into for the bespoke bracketry.
Black metal parts of the compressor were more difficult to scan (dark and shiny!). To counter this we used dry shampoo to coat the areas to create a scannable matte finish.
2. Apply scan target markers:
Applied target markers on the inside of the compressor to help the scanner align and merge multiple scan angles accurately. Due to the size and colour of the compressor’s components, markers were placed in clusters.
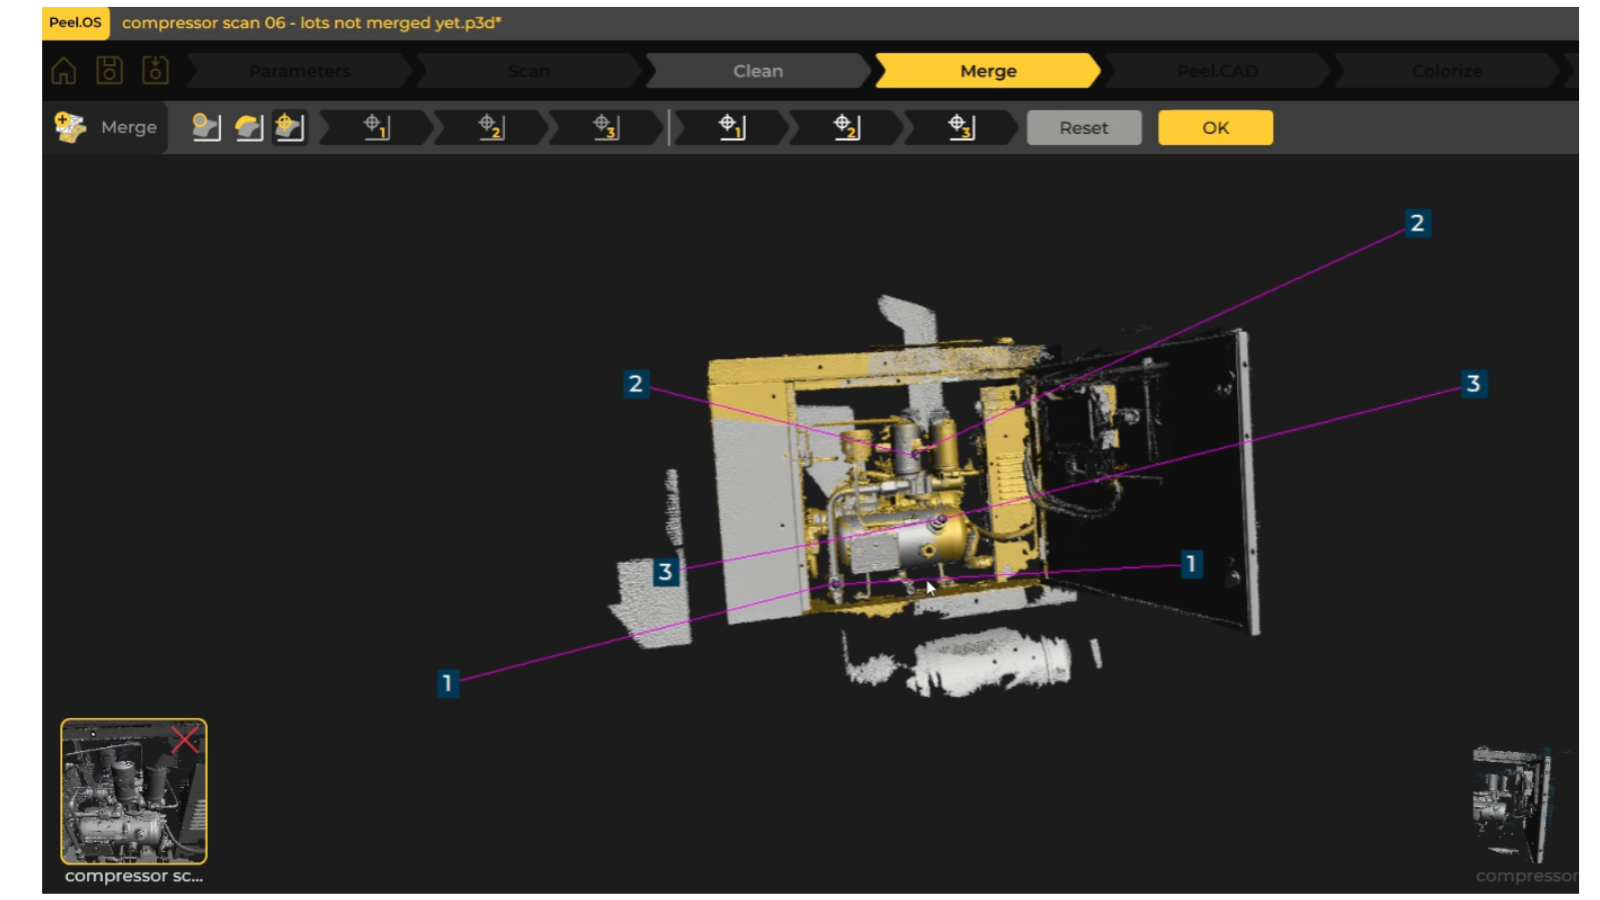
3. Scanning the complete section & merging scans:
Captured multiple scans from different angles to gain maximum scan data. Once completed, the scans were merged into a single, complete scan. As we worked on only specific areas of the compressor, we only scanned those appropriate to the design brief, to reduce data overload.
4. Generating a digital model of the compressor:
Using Peel.Cad software, used key points of the scan as a reference for building a simplified digital version of our compressor, showing key data points. This was exported into our CAD software from which the brackets could be designed using exact measurements.
5. CAD bracketry designs:
Designed 6 bespoke brackets using the data from the digital compressor model. Design iteration of each bracket was faster because measurements were readily accessible and could be cross-referenced easily in CAD from the digital model.
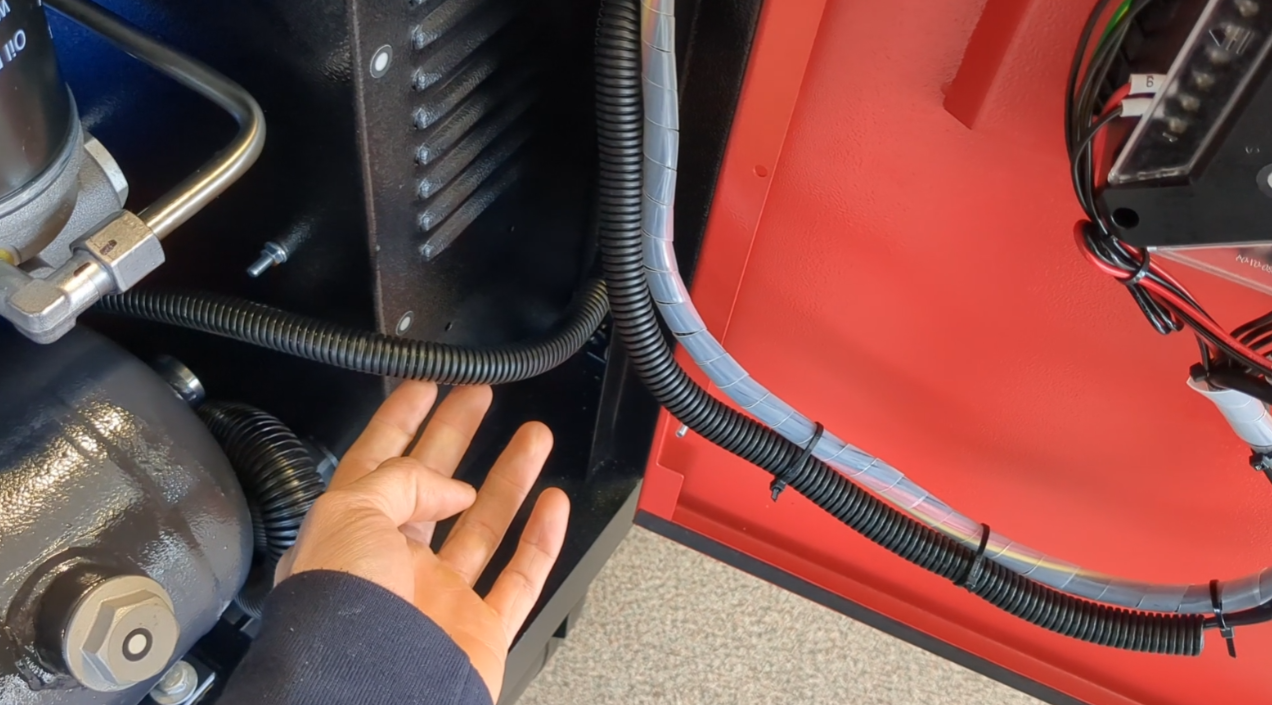
Original cables hanging loose, restricting access and entangling during maintenance and repair procedures
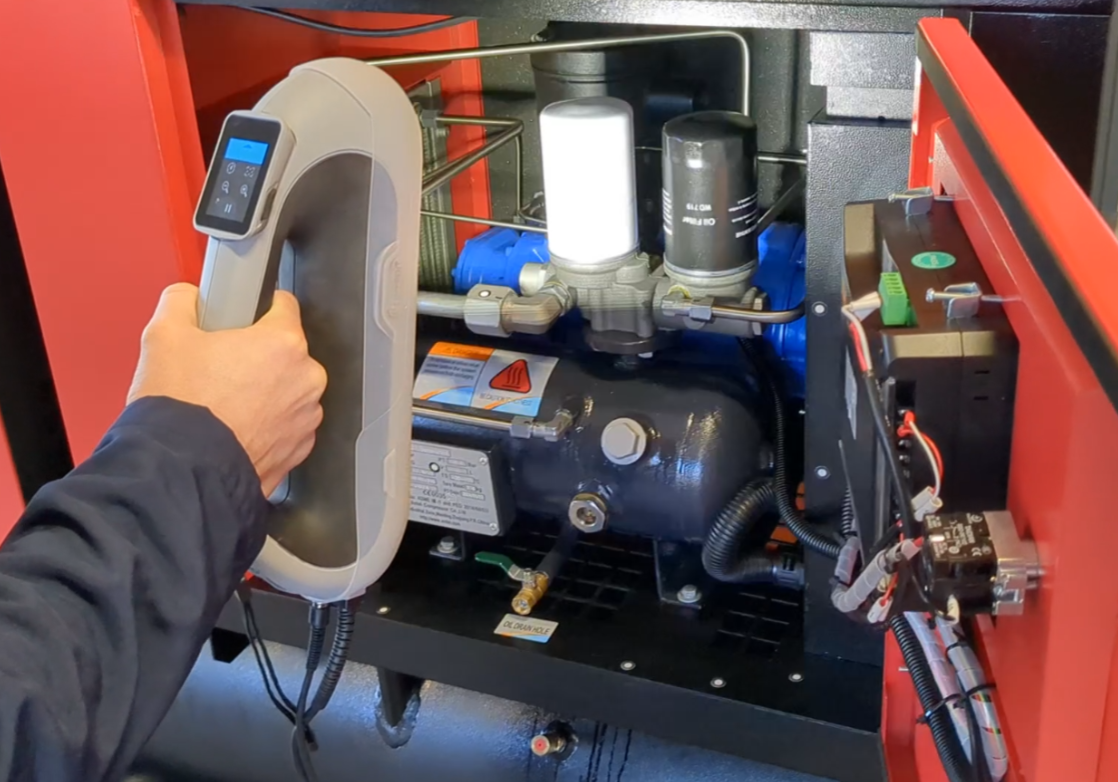
3D scanning the compressor internals using Peel 3 scanner. Target markers help scanner to align
6. Prepare for 3D printing:
Exported the finished bracket STL files and imported into Eiger (Markforged software) to prepare orientation and material selection for 3D printing. Parts were printed in Onyx (Nylon 6 blend with micro carbon fibres) on the Markforged Mark Two composite 3D printer.
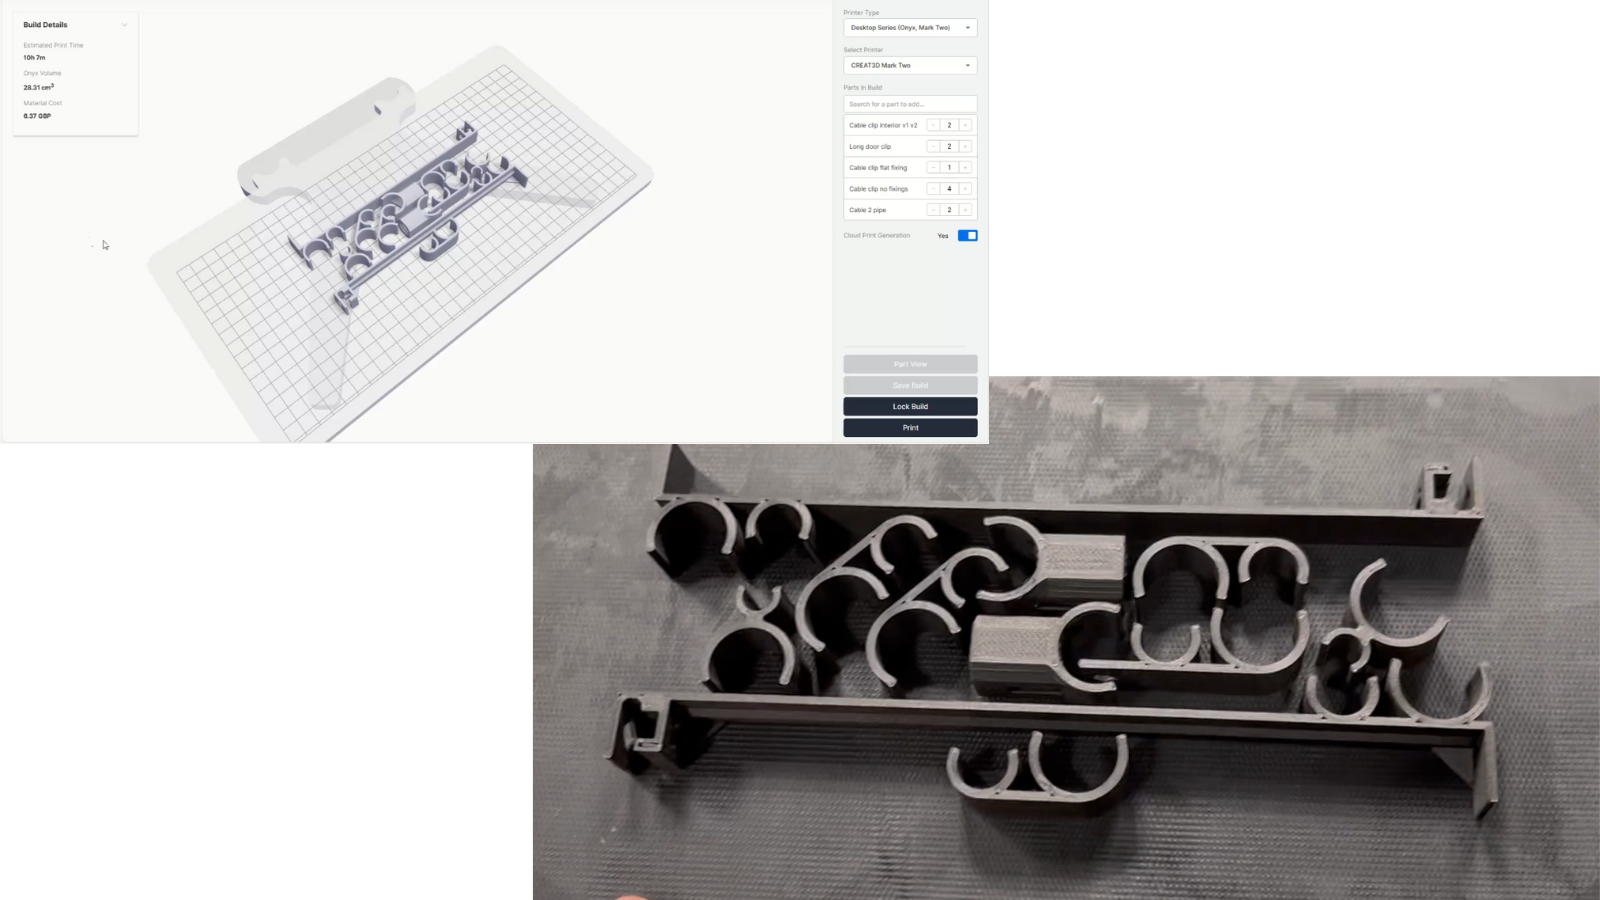
Brackets in Eiger pre-printing and completed on build plate
7. 3D printing:
Onyx material was selected due to its good surface finish, natural stiffness and heat deflection of 145°C which is well below the temperatures produced by the compressor.
All parts were printed overnight in just 9 hours.
The parts used a total of 26cc of Onyx material at a cost of £5.91.
8. Final Installation:
Installed the bespoke brackets using existing mounting points and pipework within the compressor using off-the-shelf M5 nuts bolts and washers.
Save Time and Money using 3D Scanning with AM for Operational Improvements
For engineers, combining 3D scanning and Additive Manufacturing delivers real-world engineering improvements, quickly and affordably.
These digital tools solve problems faster, using less resource, less trial and error and create confidence in a first-time fix. The ability to create exact-fit, bespoke components, on-demand also has a knock-on effect to making future repair and maintenance even easier, safer and less resource heavy.
For more information about 3D scanning and Additive Manufacturing, view our range of scanners or contact us for advice on your application.
Want to discuss the best option for adopting Additive technologies?